
In this article, We’ll learn about Data Binding, One-way, and Two-way Binding, @BindingAdapter in detail with suitable Examples in Android, and several scenarios in which it could be useful. In the end, you will have a clear understanding of this commonly used technology.
Contents
What is Data Binding?
The Data Binding Library is an Android Jetpack library that allows you to bind UI components in your XML layouts to data sources in your app using a declarative format rather than programmatically, reducing boilerplate code. It can be categorized into 2 types i.e.
1: One-Way binding
2: Two-Way binding

Why we use data binding?
It is a method for connecting user interface controls to data sources. But it does more than that.
- It improves the process of providing information to user interface controls. The connecting procedure is well-defined, with the majority of the heavy lifting taking place behind the scenes.
- It reduces the amount of code needed to create and maintain the connection. Again, the majority of the required code is hidden behind the scenes.
- It eliminates the mistakes that occur when writing new code.
- It reduces the amount of time it takes to implement the desired functionality. It goes without saying that having less to write and maintain saves the amount of time required.
Benefits:
- Enhance the performance of your app.
- Assist in preventing memory leaks and null pointer exceptions.
- Remove UI framework calls from your activity’s code to make it more organised.
With and without Data Binding
Without Data Binding

- It makes multiple calls to findViewById(). This is not only slow, but it is also unsafe because it is not tested at compilation time. The app will crash if the ID you supply to findViewById() is incorrect.
- In onCreate, it sets the initial settings (). It would be far preferable to have excellent defaults that are automatically set.
- It also makes use of the android:onClick attribute in the Button element of the XML layout declaration, which isn’t secure: The application will break at run time if the function is not implemented (or is renamed) in your activity.
- There’s a lot of code in it. Because activities and fragments develop quickly, it’s a good idea to get as much code out of them as possible. It’s also difficult to test and maintain code in activities and fragments.
With Data Binding

All of these issues can be solved with the help of the Data Binding Library by moving logic out of the activity and into places where it is reusable and easier to test.
Enable Data Binding and convert the layout
Step 1: The first step is to enable the data binding library in the build.gradle modules.
android {
    dataBinding {
        enabled true
    }
    compileSdkVersion 30
    buildToolsVersion "30.0.3"

    defaultConfig {
        applicationId "com.sagar.databinding"
        minSdkVersion 16
        targetSdkVersion 30
         ...
   }
      }
Step 2: Convert the layout to a Data Binding layout now.
To convert a regular layout to a Data Binding layout, do the following:
- Wrap your layout with a <Layout> tag
- Include layout variables (optional)
- Insert layout expressions (optional)
Navigate to activity main.xml. It’s a standard layout with a ConstraintLayout as the root element.
You must wrap the root element in a tag to convert the layout to Data Binding. You’ll also need to relocate the namespace definitions (the attributes beginning with xmlns:) to the new root element.
Android Studio provides a convenient way to do this automatically: Right-click the root element, choose Show Context Actions, and then choose Convert to data binding layout as shown below:

Your layout should now look something like this:
<?xml version="1.0" encoding="utf-8"?>
<layout xmlns:android="http://schemas.android.com/apk/res/android"
    xmlns:app="http://schemas.android.com/apk/res-auto"
    xmlns:tools="http://schemas.android.com/tools">

    <data>

    </data>

    <androidx.constraintlayout.widget.ConstraintLayout
        android:layout_width="match_parent"
        android:layout_height="match_parent"
        tools:context=".MainActivity">

        <TextView
            android:layout_width="wrap_content"
            android:layout_height="wrap_content"
            android:text="Hello World!"
            app:layout_constraintBottom_toBottomOf="parent"
            app:layout_constraintLeft_toLeftOf="parent"
            app:layout_constraintRight_toRightOf="parent"
            app:layout_constraintTop_toTopOf="parent" />

    </androidx.constraintlayout.widget.ConstraintLayout>
</layout>
After you’ve integrated binding into the layout file, go to Build -> Clean Project and Build -> Rebuild Project. This will generate the binding classes that are required.
The generated binding classes follow the naming convention considering the layout file name in which binding is enabled. The generated binding class for the layout activity main.xml will be ActivityMainBinding.
The layout variables will be enclosed in the <data> tag.
Layout variables are used in the formation of layout expressions. Layout expressions are used in the value of element attributes and are formatted as {@expression}.
You can bind components in the layout file using layout expressions.
Following are some examples:
// Bind the UserName property of the viewmodel to the text attribute
android:text="@{viewmodel.UserName}"

// Call the onShare() method on the viewmodel when the View is clicked.
android:onClick="@{() -> viewmodel.onShare()}"
Make your first layout expression.
let’s start with some static data binding.
Within the <data> tag, add two String layout variables.
   <data>
        <variable name="UserName" type="String"/>
        <variable name="UserEmail" type="String"/>
    </data>
Locate the TextView with the ID user_name and add the android: text attribute with the following layout expression:
 <TextView
                android:id="@+id/username"
                android:text="@{UserName}"
        ... />
Layout expressions begin with a @ symbol and are enclosed by curly braces.
Because UserName is a String, it will understand how to set it in the TextView. Later on, you’ll learn how to work with different expression types and attributes.
Apply the same logic to the id user_email text view:
    <TextView
                android:id="@+id/useremail"
                android:text="@{UserEmail}"
        ... />
Now we must modify the Activity so that it correctly inflates a Data Binding layout
Change the inflation and remove the UI calls from the activity.
The layout is complete, but some changes to the activity are required. Open MainActivity file.
The inflation is done differently because you’re using a Data Binding layout.
Replace: in onCreate
//
//
     setContentView(R.layout.activity_main)
//
with
//
     binding = DataBindingUtil.setContentView(this,R.layout.activity_main)
//
//
Your code looks like:

Now you can set the variable values:
//
   binding.username.text = "DevelopersDome"
   binding.useremail.text ="developersdome@gmail.com"
//
And that’s it. You simply used the data binding library to bind data.
Basic Example:
Step 1: First enable the data binding in the build.gradle(Module)
android {
...
    dataBinding {
       enabled true
    }
}
Step 2: In activity_main.xml add the textview’s in the layout file.
<?xml version="1.0" encoding="utf-8"?>
<layout xmlns:android="http://schemas.android.com/apk/res/android"
    xmlns:app="http://schemas.android.com/apk/res-auto"
    xmlns:tools="http://schemas.android.com/tools">


    <androidx.constraintlayout.widget.ConstraintLayout
        android:layout_width="match_parent"
        android:layout_height="match_parent"
        tools:context=".MainActivity">

        <TextView
            android:id="@+id/username"
            android:layout_width="wrap_content"
            android:layout_height="wrap_content"
            android:textSize="40sp"
            app:layout_constraintBottom_toBottomOf="parent"
            app:layout_constraintHorizontal_bias="0.498"
            app:layout_constraintLeft_toLeftOf="parent"
            app:layout_constraintRight_toRightOf="parent"
            app:layout_constraintTop_toTopOf="parent"
            app:layout_constraintVertical_bias="0.095" />

        <TextView
            android:id="@+id/useremail"
            android:layout_width="wrap_content"
            android:layout_height="wrap_content"
            android:textSize="30sp"
            android:textAlignment="center"
            app:layout_constraintBottom_toBottomOf="parent"
            app:layout_constraintLeft_toLeftOf="parent"
            app:layout_constraintRight_toRightOf="parent"
            app:layout_constraintTop_toTopOf="parent"
            android:gravity="center_horizontal" />

    </androidx.constraintlayout.widget.ConstraintLayout>
</layout>
After you’ve integrated data binding into the layout file, go to Build -> Clean Project and Build -> Rebuild Project. This will generate the binding classes that are required.
The generated binding classes follow the naming convention considering the layout file name in which binding is enabled. The generated binding class for the layout activity main.xml will be ActivityMainBinding.
Step 3: Working with the MainActivity file–To bind data in the UI, you must first inflate the binding layout with the generated binding classes.
package com.sagar.databinding

import androidx.appcompat.app.AppCompatActivity
import android.os.Bundle
import androidx.databinding.DataBindingUtil
import com.sagar.databinding.databinding.ActivityMainBinding

class MainActivity : AppCompatActivity() {
    lateinit var binding : ActivityMainBinding
    override fun onCreate(savedInstanceState: Bundle?) {
        super.onCreate(savedInstanceState)
        binding = DataBindingUtil.setContentView(this,R.layout.activity_main)
        binding.username.text = "DevelopersDome"
        binding.useremail.text ="developersdome@gmail.com"

    }
}
You’ll notice that we haven’t used findViewById() anywhere in this code.
Run the application now. You will get the output shown in the output section.
Output:

Advanced Example:
Step 1: First enable the data binding in build.gradle(Module).
android {
...
    dataBinding {
       enabled true
    }
}
Step 2: Create a data class.
package com.sagar.databinding

data class Data(val UserName: String,val UserEmail: String)
Step 3: In the activity_main.xml file add textview’s and <data> tag, inside <data> tag define layout expression for it.
<?xml version="1.0" encoding="utf-8"?>
<layout xmlns:android="http://schemas.android.com/apk/res/android"
    xmlns:app="http://schemas.android.com/apk/res-auto"
    xmlns:tools="http://schemas.android.com/tools">
    <data>
        <variable
            name="User"
            type="com.sagar.databinding.Data" />

    </data>


    <androidx.constraintlayout.widget.ConstraintLayout
        android:layout_width="match_parent"
        android:layout_height="match_parent"
        tools:context=".MainActivity">

        <TextView
            android:id="@+id/username"
            android:text="@{User.userName}"
            android:layout_width="wrap_content"
            android:layout_height="wrap_content"
            android:textSize="40sp"
            app:layout_constraintBottom_toBottomOf="parent"
            app:layout_constraintHorizontal_bias="0.498"
            app:layout_constraintLeft_toLeftOf="parent"
            app:layout_constraintRight_toRightOf="parent"
            app:layout_constraintTop_toTopOf="parent"
            app:layout_constraintVertical_bias="0.095" />

        <TextView
            android:id="@+id/useremail"
            android:text="@{User.userEmail}"
            android:layout_width="wrap_content"
            android:layout_height="wrap_content"
            android:textSize="30sp"
            android:textAlignment="center"
            app:layout_constraintBottom_toBottomOf="parent"
            app:layout_constraintLeft_toLeftOf="parent"
            app:layout_constraintRight_toRightOf="parent"
            app:layout_constraintTop_toTopOf="parent"
            android:gravity="center_horizontal" />

    </androidx.constraintlayout.widget.ConstraintLayout>
</layout>
After you’ve integrated data binding into the layout file, go to Build -> Clean Project and Build -> Rebuild Project. This will generate the binding classes that are required.
The generated binding classes follow the naming convention considering the layout file name in which binding is enabled. The generated binding class for the layout activity main.xml will be ActivityMainBinding.
Step 4: Working with MainActivity file–To bind data in the UI, you must first inflate the binding layout with the generated binding classes as shown below:
package com.sagar.databinding

import androidx.appcompat.app.AppCompatActivity
import android.os.Bundle
import androidx.databinding.DataBindingUtil
import com.sagar.databinding.databinding.ActivityMainBinding

class MainActivity : AppCompatActivity() {
    lateinit var binding : ActivityMainBinding
    override fun onCreate(savedInstanceState: Bundle?) {
        super.onCreate(savedInstanceState)
        binding = DataBindingUtil.setContentView(this,R.layout.activity_main)
        val dataObject = Data("DevelopersDome","developersdome@gmail.com")
        binding.user =dataObject

    }
}
You’ll notice that we haven’t used findViewById() anywhere in this code.
Run the application now. You will get the output shown in the output section.
Output:
- Their is no difference between output of both example
Congratulations! You completed the Basics of Data binding library, so you should know how to create the layouts, add variables and expressions to it.
Difference between One-Way and Two-Way Data Binding

| One-Way Binding | Two-Way Binding |
|---|---|
| The data will be bound from the component to the view or from the view to the component in a one-way binding. it is unidirectional. | The sharing of data between a component class and its template is referred to as two-way data binding. If you change data in one location, it will automatically reflate at the other. If you change the value of an input box, for example, it will also change the value of an attached property in a component class. |
Data Binding with LiveData
The Data Binding Library is becoming increasingly popular in the development of Android applications because it extends the benefits of the MVVM architecture. It enables you to use a declarative format to bind UI components in your layouts to data sources in your app rather than programmatically. Wouldn’t it be nice to have the UI automatically notify you of changes in the data and have changed in the UI attributes propagated back to you So, let’s look at how we can bind to LiveData using this!
Why we use LiveData?
The following are some of the benefits of using lifecycle aware components, such as LiveData:
- There have been no crashes as a result of activities being stopped. When an observer’s lifecycle is inactive, such as when an activity is in the back stack, it does not receive LiveData events.
- Changes in proper configuration. When an activity or fragment is recreated as a result of a configuration change (for example, device rotation), it receives the most recent available data right away.
- There are no memory leaks. There is no need to manually dispose of subscriptions. When their associated lifecycle is destroyed, the observers clean up after themselves.
Data Binding with LiveData in One-Way Binding Example
Updating the views from the data source is a simple one-way binding. In that case, you’ll only access data from the data source and update the layout.

One-Way binding XML code
      One- Way data binding
//
         android:text="@{mainViewModel.liveData}"
//
Getting Started
Step 1: Add the following dependency in your app’s build.gradle to start working with viewmodel and liveData, also enable data-binding:
  android {
    ...

    dataBinding {
        enabled = true
    }

dependencies {

         // ViewModel
    implementation("androidx.lifecycle:lifecycle-viewmodel-ktx:2.4.0-alpha03")
    // LiveData
    implementation("androidx.lifecycle:lifecycle-livedata-ktx:2.4.0-alpha03")
}
Step 2: In activity_main.xml add textView and Button, and convert the regular layout -(ConstraintLayout) to data binding layout, and add the <data> tag inside the <layout> tag, and initialize layout expression init.
<?xml version="1.0" encoding="utf-8"?>
<layout xmlns:android="http://schemas.android.com/apk/res/android"
    xmlns:app="http://schemas.android.com/apk/res-auto"
    xmlns:tools="http://schemas.android.com/tools">
<data>
    <variable
        name="mainViewModel"
        type="com.sagar.databinding.MainViewModel" />
</data>

    <androidx.constraintlayout.widget.ConstraintLayout
        android:layout_width="match_parent"
        android:layout_height="match_parent"
        tools:context=".MainActivity">


        <TextView
            android:id="@+id/TextView"
            android:layout_width="wrap_content"
            android:layout_height="wrap_content"
            android:gravity="center_horizontal"
            android:textAlignment="center"
            android:textSize="30sp"
            android:text="@{mainViewModel.liveData}"
            app:layout_constraintBottom_toBottomOf="parent"
            app:layout_constraintLeft_toLeftOf="parent"
            app:layout_constraintRight_toRightOf="parent"
            app:layout_constraintTop_toTopOf="parent"
            app:layout_constraintVertical_bias="0.189" />

        <Button
            android:id="@+id/button"
            android:layout_width="wrap_content"
            android:layout_height="wrap_content"
            android:layout_marginBottom="148dp"
            android:text="Select"
            android:onClick="@{()-> mainViewModel.updateData()}"
            android:backgroundTint="@color/black"
            app:layout_constraintBottom_toBottomOf="parent"
            app:layout_constraintEnd_toEndOf="parent"
            app:layout_constraintStart_toStartOf="parent" />


    </androidx.constraintlayout.widget.ConstraintLayout>
</layout>
Step 3: Create a MainViewModel class, in this mainViewModel define livedata.
package com.sagar.databinding

import androidx.lifecycle.MutableLiveData
import androidx.lifecycle.ViewModel

class MainViewModel: ViewModel(){
    val LiveData = MutableLiveData("Developers Dome")
    fun updateData(){
        LiveData.value = "Have a Nice Day"
    }
}
Step 4: Working with MainActivity file– To bind data in the UI, you must first inflate the binding layout with the generated binding classes and initialize mainViewModel.
package com.sagar.databinding

import android.os.Bundle
import androidx.appcompat.app.AppCompatActivity
import androidx.databinding.DataBindingUtil
import androidx.lifecycle.ViewModelProvider
import com.sagar.databinding.databinding.ActivityMainBinding

class MainActivity : AppCompatActivity() {
    lateinit var binding : ActivityMainBinding
    lateinit var mainViewModel: MainViewModel
    override fun onCreate(savedInstanceState: Bundle?) {
        super.onCreate(savedInstanceState)

        binding = DataBindingUtil.setContentView(this,R.layout.activity_main)
        mainViewModel = ViewModelProvider(this)[MainViewModel::class.java]

        binding.lifecycleOwner= this
        binding.mainViewModel = mainViewModel

    }
}
Run the application now. You will get the output shown in the output section.
Output:
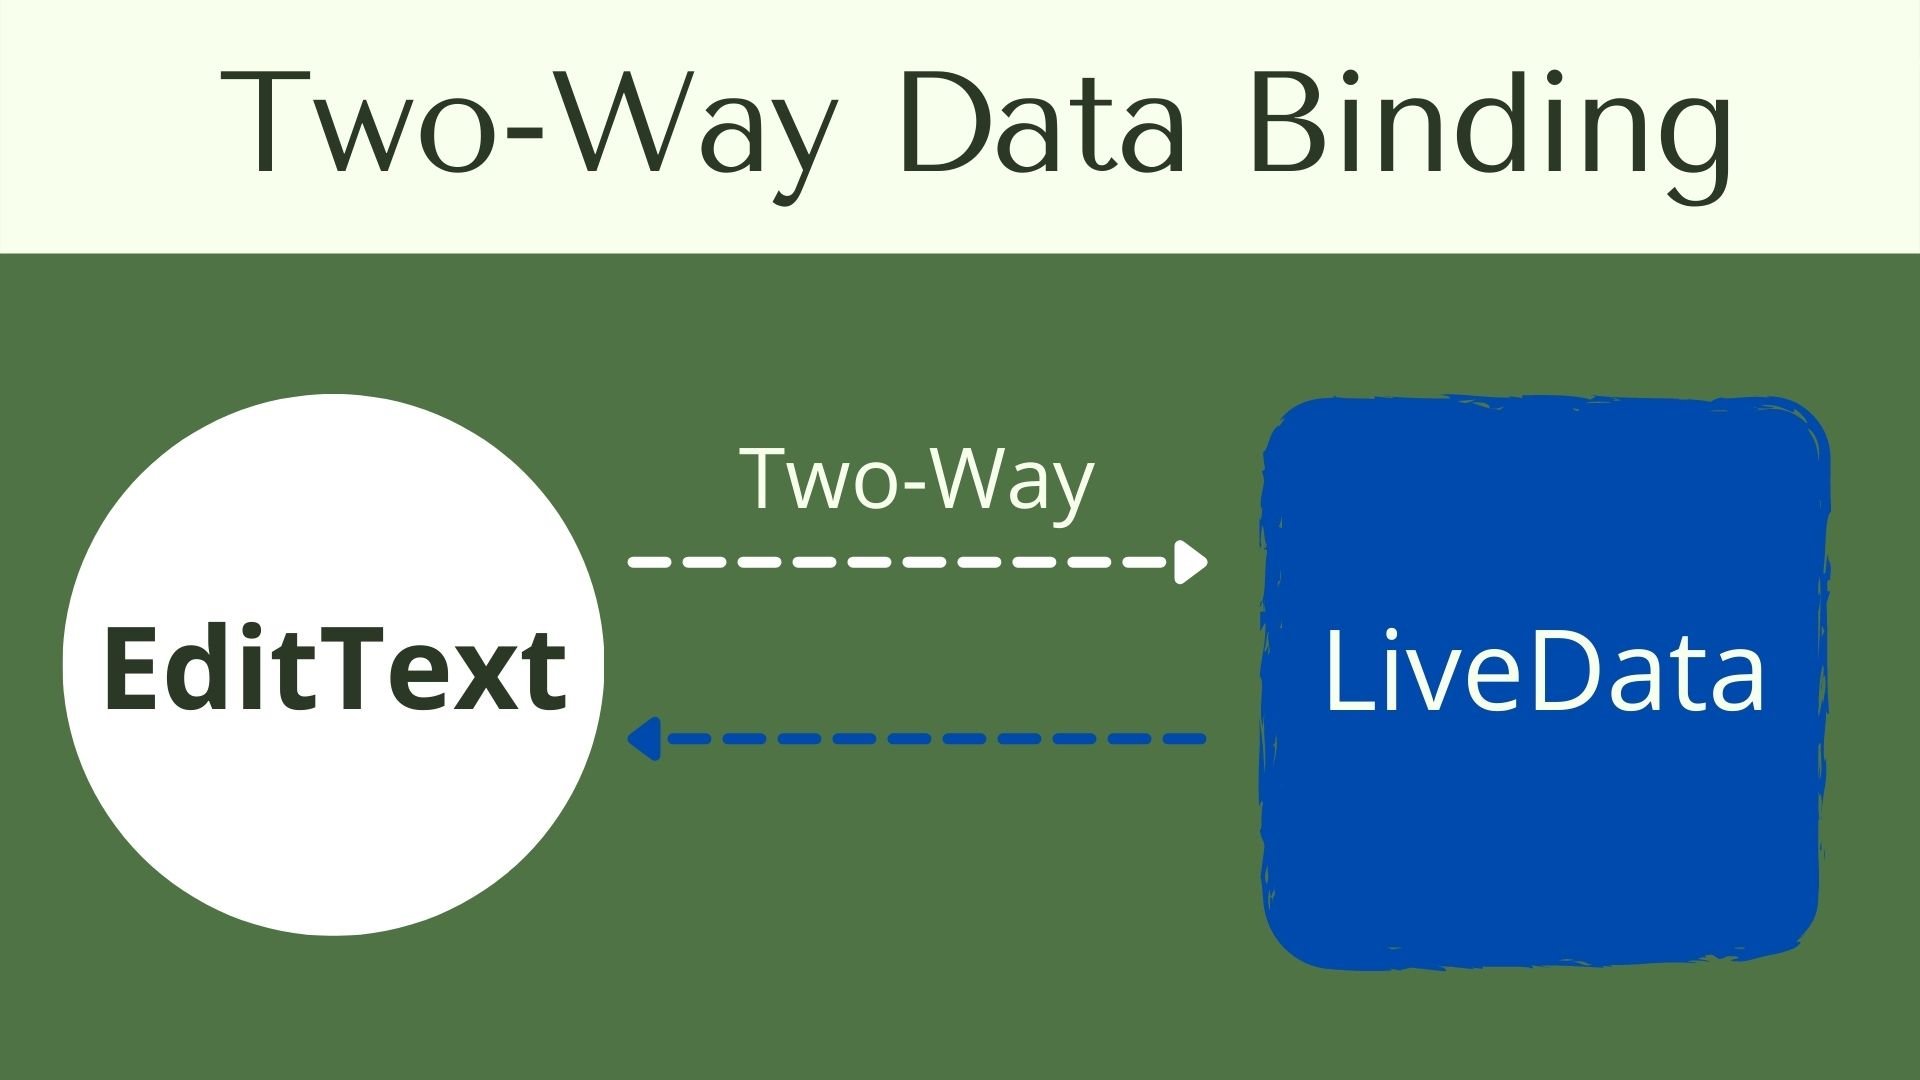
Data Binding with LiveData in Two-Way Binding Example
Two-way binding allows your application’s components to share data. Use two-way binding to listen for events and update values between parent and child components at the same time. Consider the following live example.

Two-Way binding XML code
      Two-Way data binding
//
            android:text="@={mainViewModel.liveData}"
//
In two way data binding "=" is extra
Getting Started
Step 1: Add the following dependency in your app’s build.gradle to start working with ViewModel and liveData, also enable data-binding:
  android {
    ...

    dataBinding {
        enabled = true
    }

dependencies {

         // ViewModel
    implementation("androidx.lifecycle:lifecycle-viewmodel-ktx:2.4.0-alpha03")
    // LiveData
    implementation("androidx.lifecycle:lifecycle-livedata-ktx:2.4.0-alpha03")
}
Step 2: In activity_main.xml add TextView,EditText and Button, and convert the regular layout -(ConstraintLayout) to data binding layout,and add the <data> tag inside the <layout> tag, and initialize layout expression init.
<?xml version="1.0" encoding="utf-8"?>
<layout xmlns:android="http://schemas.android.com/apk/res/android"
    xmlns:app="http://schemas.android.com/apk/res-auto"
    xmlns:tools="http://schemas.android.com/tools">
<data>
    <variable
        name="mainViewModel"
        type="com.sagar.databinding.MainViewModel" />
</data>

    <androidx.constraintlayout.widget.ConstraintLayout
        android:layout_width="match_parent"
        android:layout_height="match_parent"
        android:background="@color/white"
        tools:context=".MainActivity">


        <TextView
            android:id="@+id/TextView"
            android:layout_width="wrap_content"
            android:layout_height="wrap_content"
            android:gravity="center_horizontal"
            android:text="@{mainViewModel.liveData}"
            android:textAlignment="center"
            android:textColor="@color/black"
            android:textSize="30sp"
            app:layout_constraintBottom_toBottomOf="parent"
            app:layout_constraintLeft_toLeftOf="parent"
            app:layout_constraintRight_toRightOf="parent"
            app:layout_constraintTop_toTopOf="parent"
            app:layout_constraintVertical_bias="0.189" />

        <EditText
            android:id="@+id/editText"
            android:layout_width="wrap_content"
            android:layout_height="wrap_content"
            android:layout_marginTop="142dp"
            android:text="@={mainViewModel.liveData}"   //Two way data binding
            app:layout_constraintBottom_toTopOf="@+id/button"
            app:layout_constraintEnd_toEndOf="parent"
            app:layout_constraintHorizontal_bias="0.498"
            app:layout_constraintStart_toStartOf="parent"
            app:layout_constraintTop_toBottomOf="@+id/TextView"
            app:layout_constraintVertical_bias="0.0" />

        <Button
            android:id="@+id/button"
            android:layout_width="wrap_content"
            android:layout_height="wrap_content"
            android:layout_marginBottom="148dp"
            android:backgroundTint="@color/black"
            android:onClick="@{()-> mainViewModel.updateData()}"
            android:text="Swap"
            android:textColor="@color/teal_200"
            app:layout_constraintBottom_toBottomOf="parent"
            app:layout_constraintEnd_toEndOf="parent"
            app:layout_constraintStart_toStartOf="parent" />


    </androidx.constraintlayout.widget.ConstraintLayout>
</layout>
Step 3: Create a MainViewModel class, in this mainViewModel define livedata.
package com.sagar.databinding

import androidx.lifecycle.MutableLiveData
import androidx.lifecycle.ViewModel

class MainViewModel: ViewModel(){
    val LiveData = MutableLiveData("Developers Dome")
    fun updateData(){
        LiveData.value = "Have a Nice Day"
    }
}
Step 4: Working with MainActivity file– To bind data in the UI, you must first inflate the binding layout with the generated binding classes and initialize mainViewModel.
package com.sagar.databinding

import android.os.Bundle
import android.view.Window
import android.view.WindowManager
import androidx.appcompat.app.AppCompatActivity
import androidx.databinding.DataBindingUtil
import androidx.lifecycle.ViewModelProvider
import com.sagar.databinding.databinding.ActivityMainBinding

class MainActivity : AppCompatActivity() {
    lateinit var binding : ActivityMainBinding
    lateinit var mainViewModel: MainViewModel
    override fun onCreate(savedInstanceState: Bundle?) {
        super.onCreate(savedInstanceState)

        binding = DataBindingUtil.setContentView(this,R.layout.activity_main)
        mainViewModel = ViewModelProvider(this)[MainViewModel::class.java]

         binding.lifecycleOwner= this
        binding.mainViewModel = mainViewModel

    }
}
Run the application now. You will get the output shown in the output section.
Output:
The sharing of data between a component class and its template is referred to as two-way binding. If you change data in one location, it will automatically reflate at the other. If you change the value of an input box, for example, it will also change the value of an attached property in a component class.
What is Binding Adapter?
It is simple to define a custom attribute that can be used in layout files using the Android data binding framework. Binding Adapter is also a part of it, It’s simply a static method annotated with @BindingAdapter and the appropriate parameters. The most common example is a method that allows you to use Glide or Picasso to populate an ImageView with an image downloaded from a URL.
We are going to add custom attributes to our project. That is, we will create a @BindingAdapter and then define some new attributes and actions for it.
Binding Adapter Code
@BindingAdapter("imageUrl")
fun ImageView.imageUrl(url: String) {
    Glide.with(this.context).load(url).into(this)
}
Working with Binding Adapter Example
Get Started
Step 1: To start with Binding Adapter: Add the ‘kotlin-kapt’ plugin, enable the binding, and add the dependency for livedata, ViewModel, and Glide.
plugins {
    id 'com.android.application'
    id 'kotlin-android'
    id 'kotlin-kapt'  //<-- Add this kotlin-kapt plugin
}

android {
    dataBinding {
        enabled true //<--enable the data binding
    }
    compileSdkVersion 30
    buildToolsVersion "30.0.3"
...
}

// Add the following dependency
dependencies {

    // ViewModel
    implementation("androidx.lifecycle:lifecycle-viewmodel-ktx:2.4.0-alpha03")
    // LiveData
    implementation("androidx.lifecycle:lifecycle-livedata-ktx:2.4.0-alpha03")
    // Glide
    implementation 'com.github.bumptech.glide:glide:4.12.0'
      annotationProcessor 'com.github.bumptech.glide:compiler:4.12.0'
   }
Step 2: Add internet permission to the AndroidManifest.xml file
- Because we work with network operations for image downloading, we require Internet connection permission.
//
 internet permission <uses-permission android:name="android.permission.INTERNET"/>
//
- Below is the code of the AndroidManifest.xml file:
<?xml version="1.0" encoding="utf-8"?>
<manifest xmlns:android="http://schemas.android.com/apk/res/android"
    package="com.sagar.databinding">

    <uses-permission android:name="android.permission.INTERNET"/>

    <application
        android:allowBackup="true"
        android:icon="@mipmap/ic_launcher"
        android:label="@string/app_name"
        android:roundIcon="@mipmap/ic_launcher_round"
        android:supportsRtl="true"
        android:theme="@style/Theme.DataBinding">
        <activity android:name=".MainActivity">
            <intent-filter>
                <action android:name="android.intent.action.MAIN" />

                <category android:name="android.intent.category.LAUNCHER" />
            </intent-filter>
        </activity>
    </application>

</manifest>
Step 3: Create a Data Class and name it ‘Userdata’.
package com.sagar.databinding

data class Userdata(val title: String, val description: String, val url: String)
Step 4: Create an Adapter file and initialize a custom attribute or @BindingAdapter with the name as imageUrl as shown below.
package com.sagar.databinding

import android.widget.ImageView
import androidx.databinding.BindingAdapter
import com.bumptech.glide.Glide

@BindingAdapter("imageUrl")
fun ImageView.imageUrl(url: String) {
    Glide.with(this.context).load(url).into(this)
}
Step 5: In activity_main.xml add two textView and one imageView, and convert the regular layout -(ConstraintLayout) to a data binding layout, add the <data> tag inside the <layout> tag, initialize layout expression init, and add a custom attribute(“imageUrl”) in ImageView which you create in Adapter file.
<?xml version="1.0" encoding="utf-8"?>
<layout xmlns:android="http://schemas.android.com/apk/res/android"
    xmlns:app="http://schemas.android.com/apk/res-auto"
    xmlns:tools="http://schemas.android.com/tools">
<data>
    <variable
        name="UserData"
        type="com.sagar.databinding.Userdata" />
</data>

    <androidx.constraintlayout.widget.ConstraintLayout
        android:layout_width="match_parent"
        android:layout_height="match_parent"
        android:background="@color/white"
        tools:context=".MainActivity">

        <TextView
            android:layout_width="0dp"
            style="@style/TextAppearance.AppCompat.Headline"
            android:layout_height="wrap_content"
            app:layout_constraintBottom_toBottomOf="parent"
            app:layout_constraintEnd_toEndOf="parent"
            android:text="@{UserData.title}"
            android:textColor="@color/black"
            android:textAlignment="center"
            app:layout_constraintHorizontal_bias="1.0"
            app:layout_constraintStart_toStartOf="parent"
            app:layout_constraintTop_toTopOf="parent"
            app:layout_constraintVertical_bias="0.054"
            android:gravity="center_horizontal" />

        <TextView
            android:layout_width="0dp"
            android:layout_height="wrap_content"
            android:textSize="20sp"
            android:textColor="@color/black"
            android:textAlignment="center"
            android:text="@{UserData.description}"
            app:layout_constraintBottom_toBottomOf="parent"
            app:layout_constraintEnd_toEndOf="parent"
            app:layout_constraintHorizontal_bias="0.0"
            app:layout_constraintStart_toStartOf="parent"
            app:layout_constraintTop_toTopOf="parent"
            app:layout_constraintVertical_bias="0.167"
            android:gravity="center_horizontal" />

        <ImageView
            imageUrl="@{UserData.url}"
            android:layout_width="wrap_content"
            android:layout_height="wrap_content"
            app:layout_constraintBottom_toBottomOf="parent"
            app:layout_constraintEnd_toEndOf="parent"
            app:layout_constraintHorizontal_bias="0.5"
            app:layout_constraintStart_toStartOf="parent"
            app:layout_constraintTop_toTopOf="parent" />


    </androidx.constraintlayout.widget.ConstraintLayout>
</layout>
Step 6: Working with MainActivity file– To bind data in the UI, you must first inflate the binding layout with the generated binding classes and define the title, description, and URL to the userdata.
package com.sagar.databinding

import android.os.Bundle
import androidx.appcompat.app.AppCompatActivity
import androidx.databinding.DataBindingUtil
import com.sagar.databinding.databinding.ActivityMainBinding

class MainActivity : AppCompatActivity() {
    lateinit var binding: ActivityMainBinding
    override fun onCreate(savedInstanceState: Bundle?) {
        super.onCreate(savedInstanceState)

        binding = DataBindingUtil.setContentView(this, R.layout.activity_main)
        val userdata = Userdata(
            "Welcome to Developers Dome",
            "Sagar Paliwal",
            "https://i1.wp.com/developersdome.com/wp-content/uploads/2021/08/Classic-Black-and-Gold-LinkedIn-Post-Header.jpg?resize=2048%2C1152&ssl=1"
        )
        binding.userData= userdata

    }
}
Run the application now. You will get the output shown in the output section.
- We hope that this guide will assist you in understanding all the concepts of Data Binding in android. We have concentrated on making a basic, meaningful, and easy-to-learn guide to the concepts of Data Binding with suitable examples. Still, if you have any problems regarding Data, please post them in the comments section, we will be glad to assist you.


Pingback: View Binding in Android with Example - Developers Dome
Pingback: Android ViewModel Tutorial with Example - Developers Dome
Pingback: LiveData Android Example - Developers Dome
Pingback: Android RecyclerView in Kotlin with Example - Developers Dome
Pingback: Option Menu in Android With Example - Developers Dome